User Upload to Load Data to Ml Studio
Upload Image data-fix to Azure Auto Learning studio from local automobile !!
*Steps with paradigm

I was working with computer vision project. The data ready was large in size(Epitome information fix) around 2Gb. Then I decided to train the model on Azure Cloud. The Azure documentation is perfect resource to setup environs for machine learning, but at a specific signal you won't find the solution for specific task. How to upload data set of size more 95Mb? How to download model to local Automobile?, etc.
Azure Machine Learning Documentation
In this blog, I will explain verbal steps that need to follow to create surround, notebook, compute, upload data set, load it in your environment.
Pre-requisite: Azure Cloud Account.

Footstep 1:
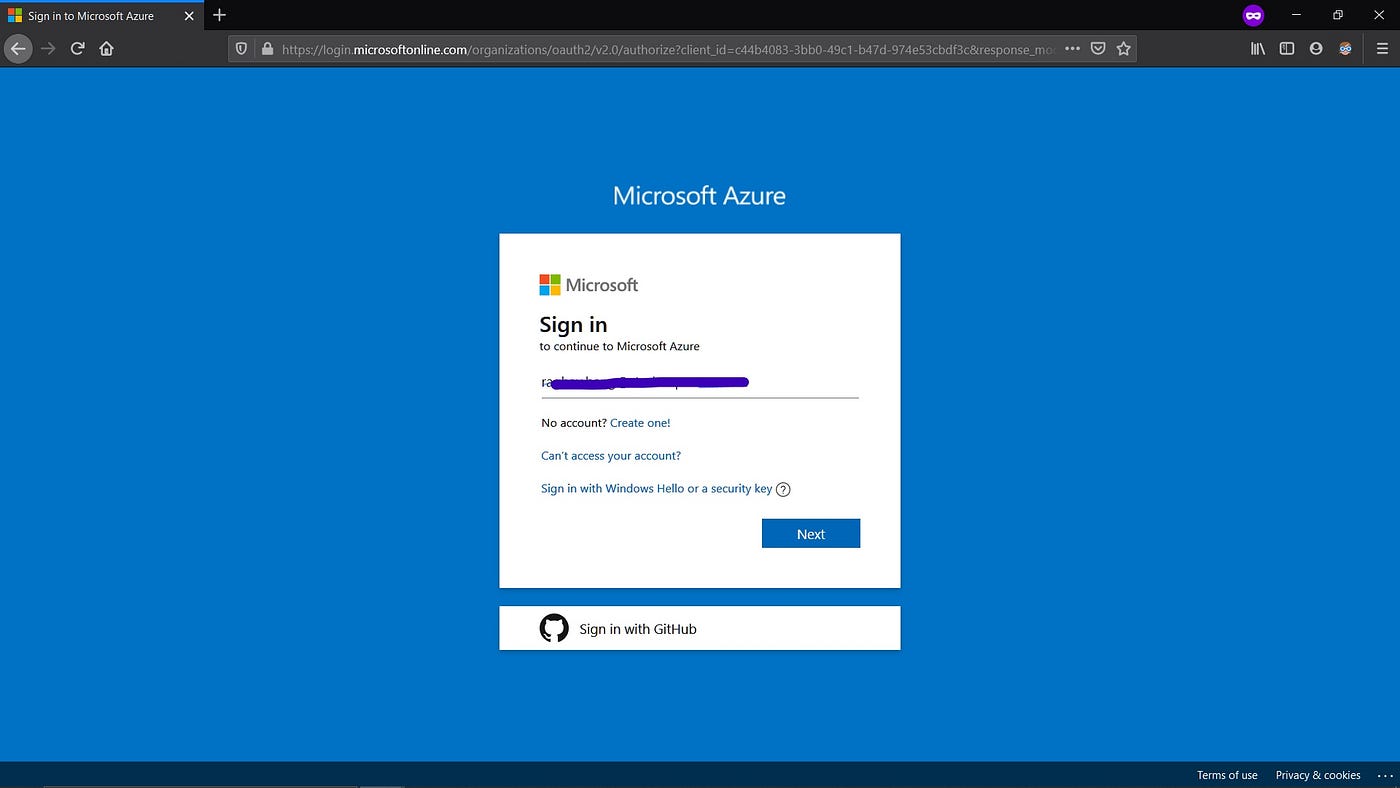
Login to Azure Cloud Portal
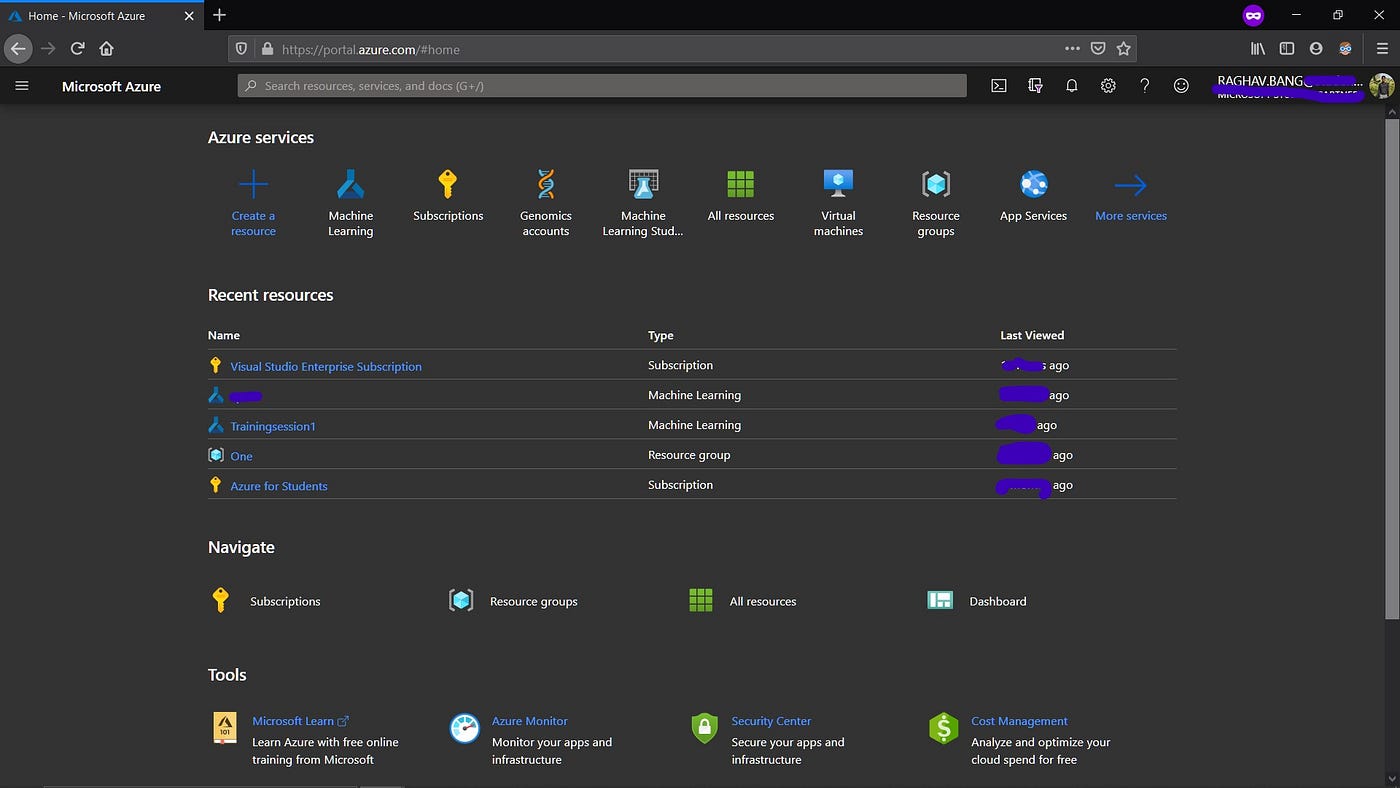
Enter your email id and password. And so yous will exist redirected to Azure Portal Page.
Step 2:
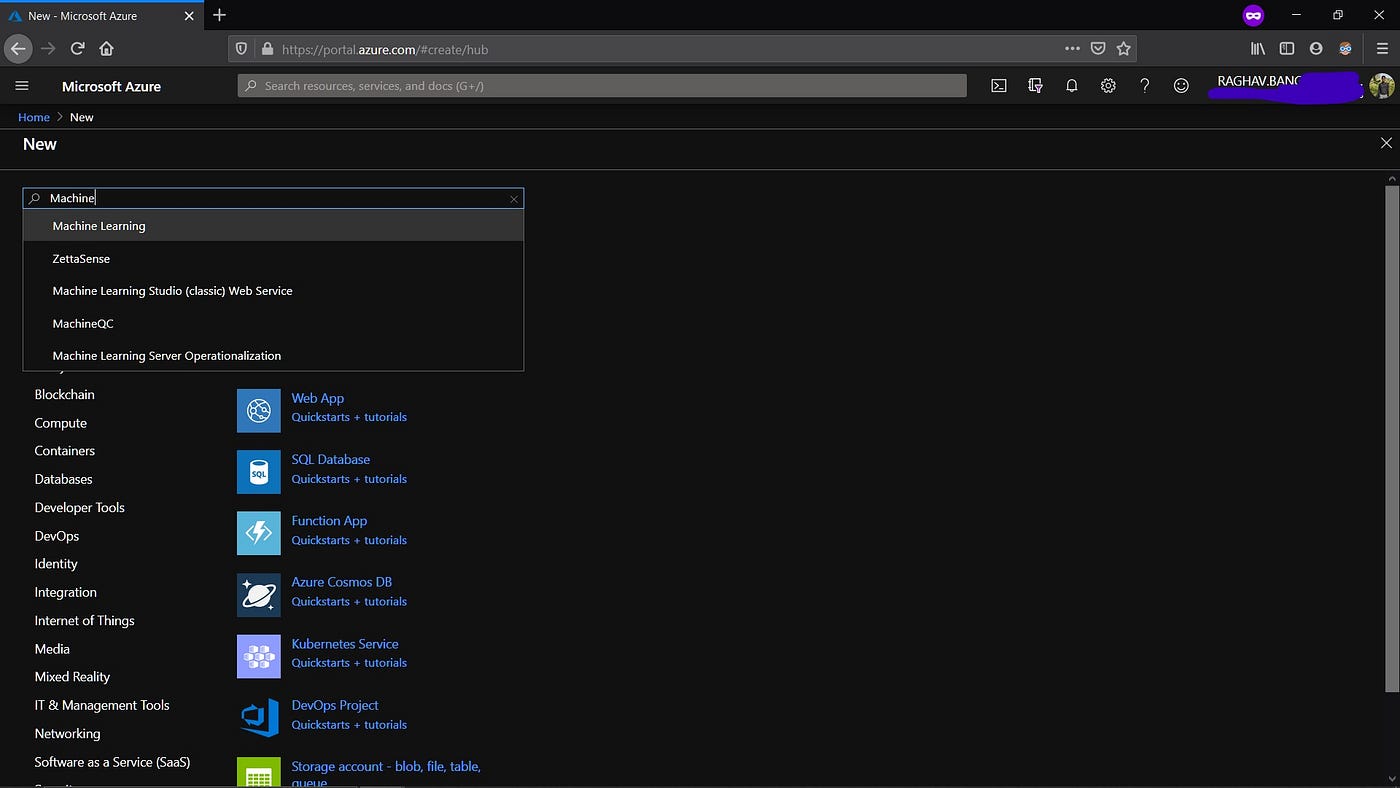
Now click on "Create a Resource". Type "Automobile Learning" in the search box and select the first option.
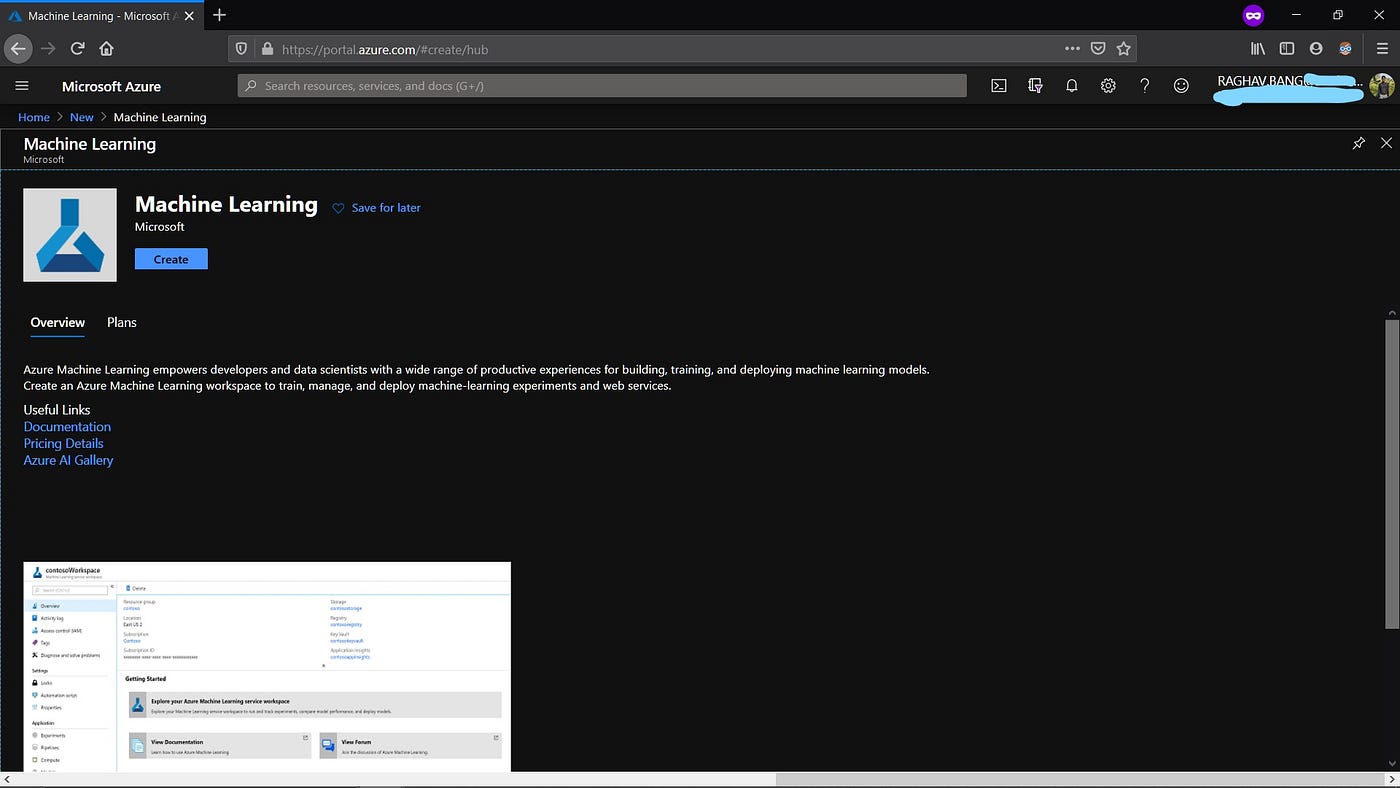
Automobile Learning Dashboard volition pop up. Click on "Create" Button. It will enquire you to fill some data.
"Workspace Name": Name of the environs/workspace"
"Subscription": Select the subscription.
"Resources Group": If y'all have already created a resources grouping, use it. Or you tin create new via clicking on "Create new" button below resources grouping. Type the proper name of resource group as per your choice. (Note: It should exist unique).
"Location": Cull your location.
"Workspace Edition": Choose anyone of available edition.
And then click on "Review and Create" push button. It volition review your all inputs. If all are right, then it testify check sign in each field.

Now, if all field inputs are valid, and then click on "Create" button.
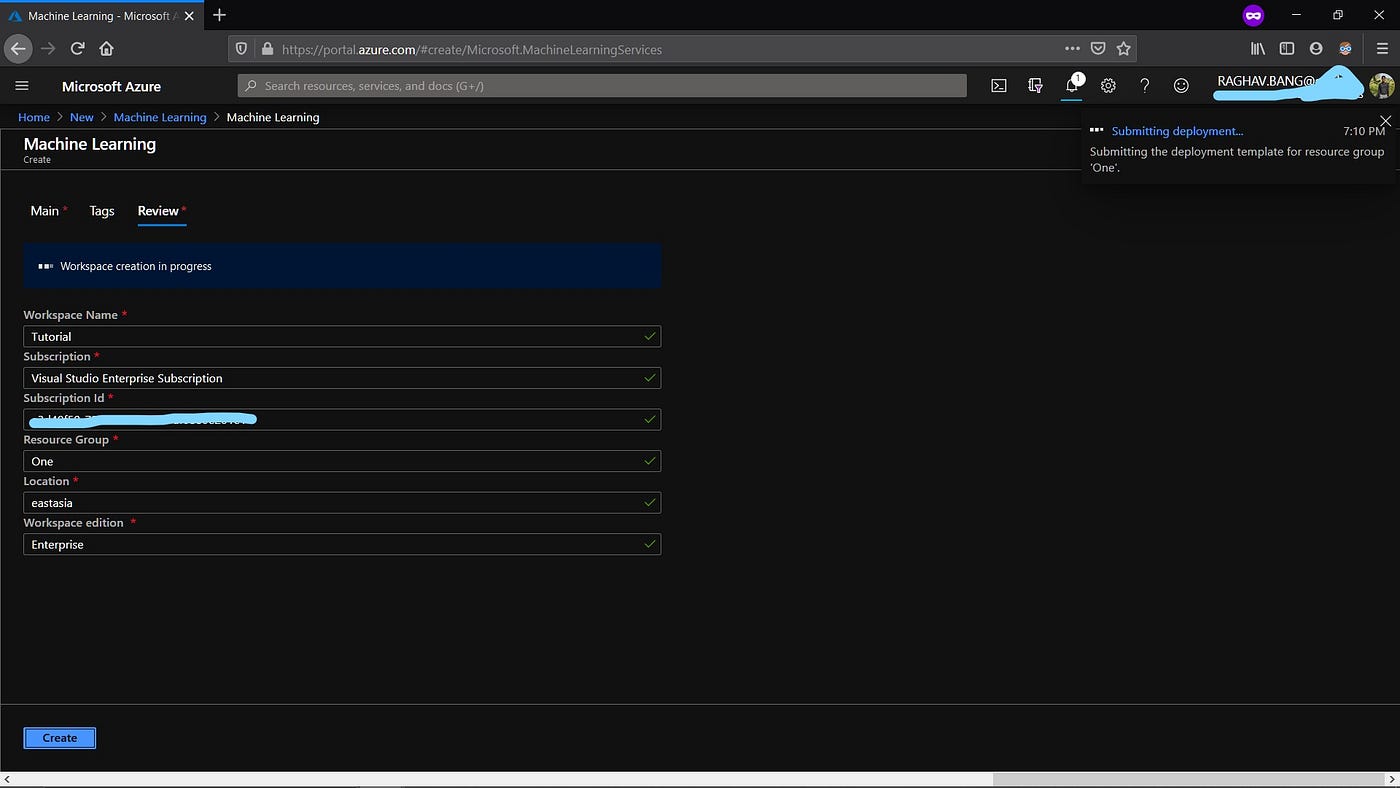
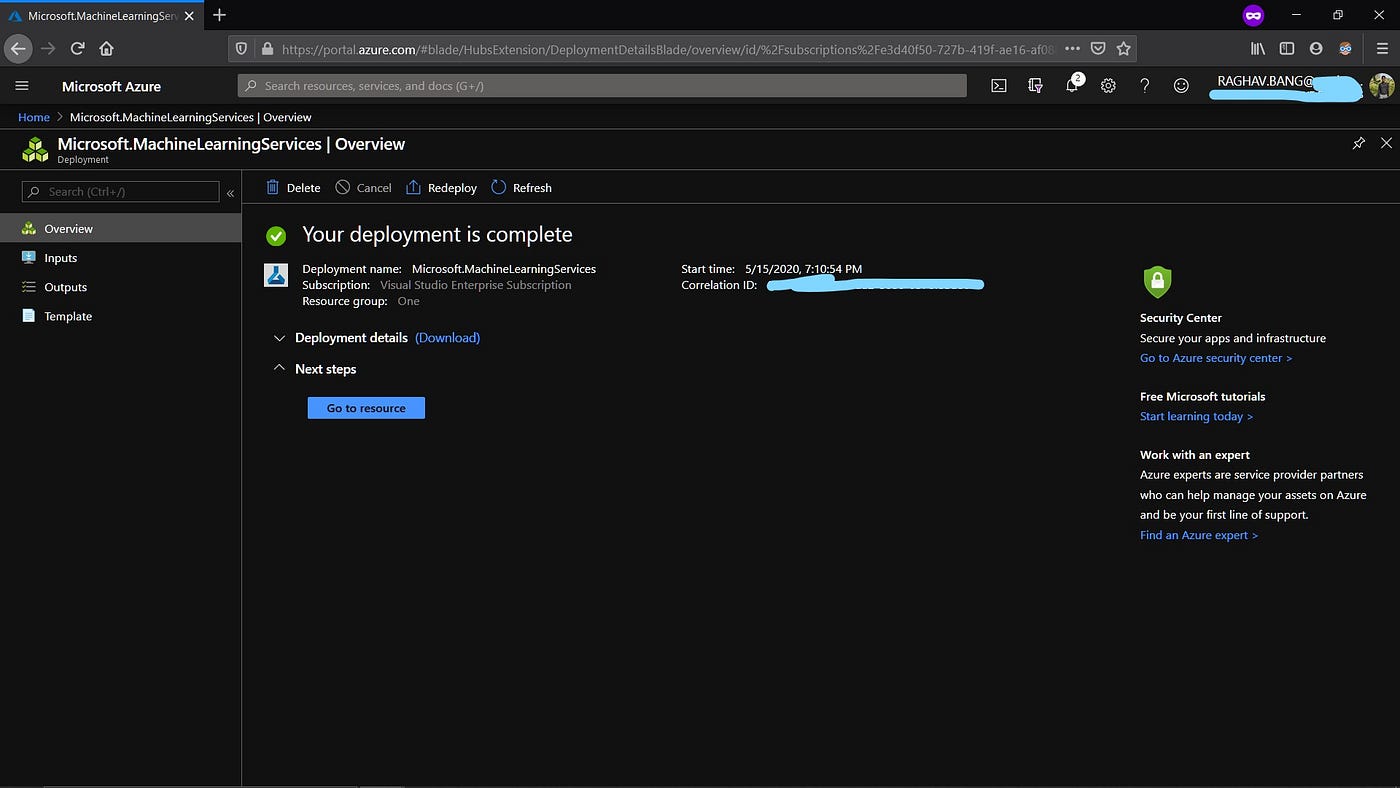
This will start creation of workspace and take you to the deployment page. The deployment will be in process. Wait for few seconds. Once the deployment is finished information technology will show the message "Your deployment is complete". Now click on "Go to Resource" button.
Step 3:
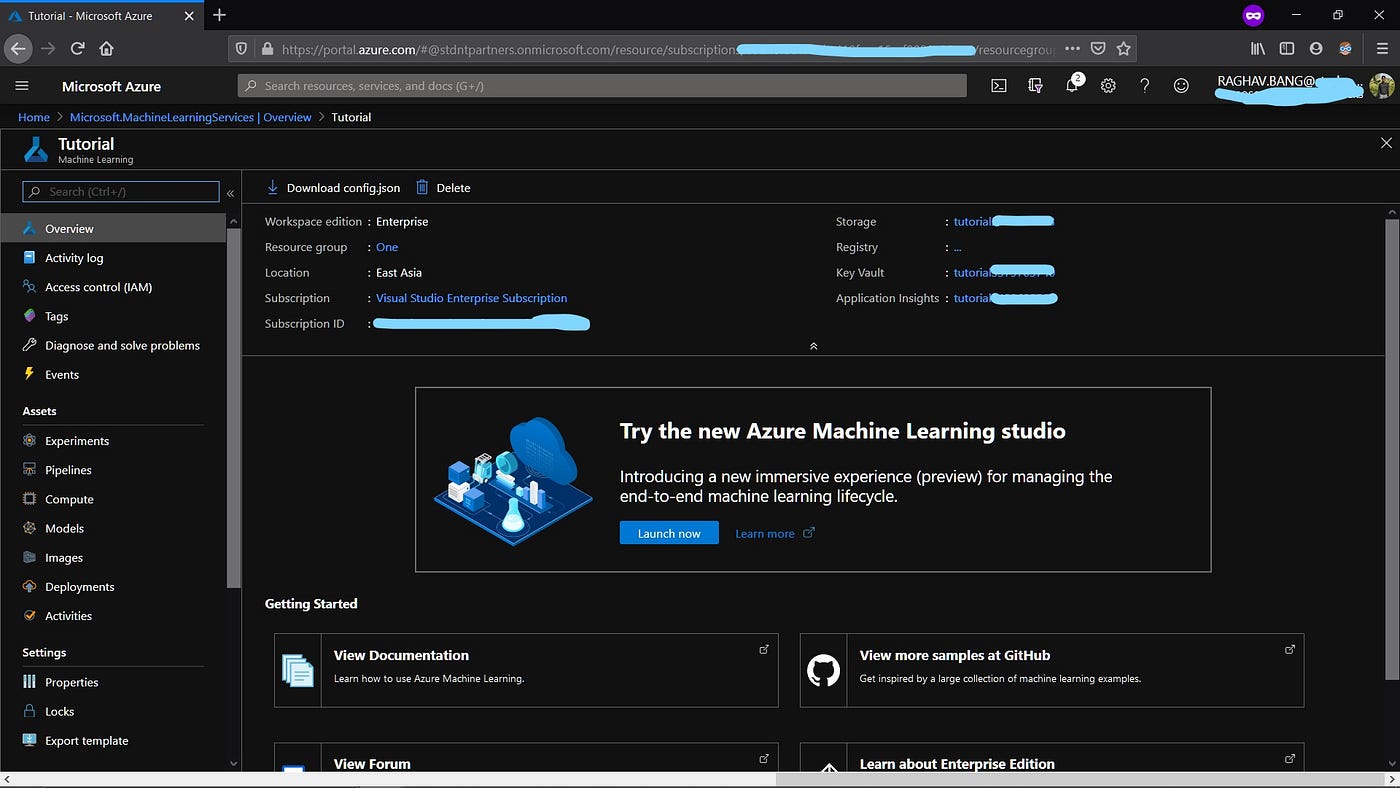
It will show your workspace overview folio. From here you lot will exist able to control your whole workspace. Click on "Launch At present".
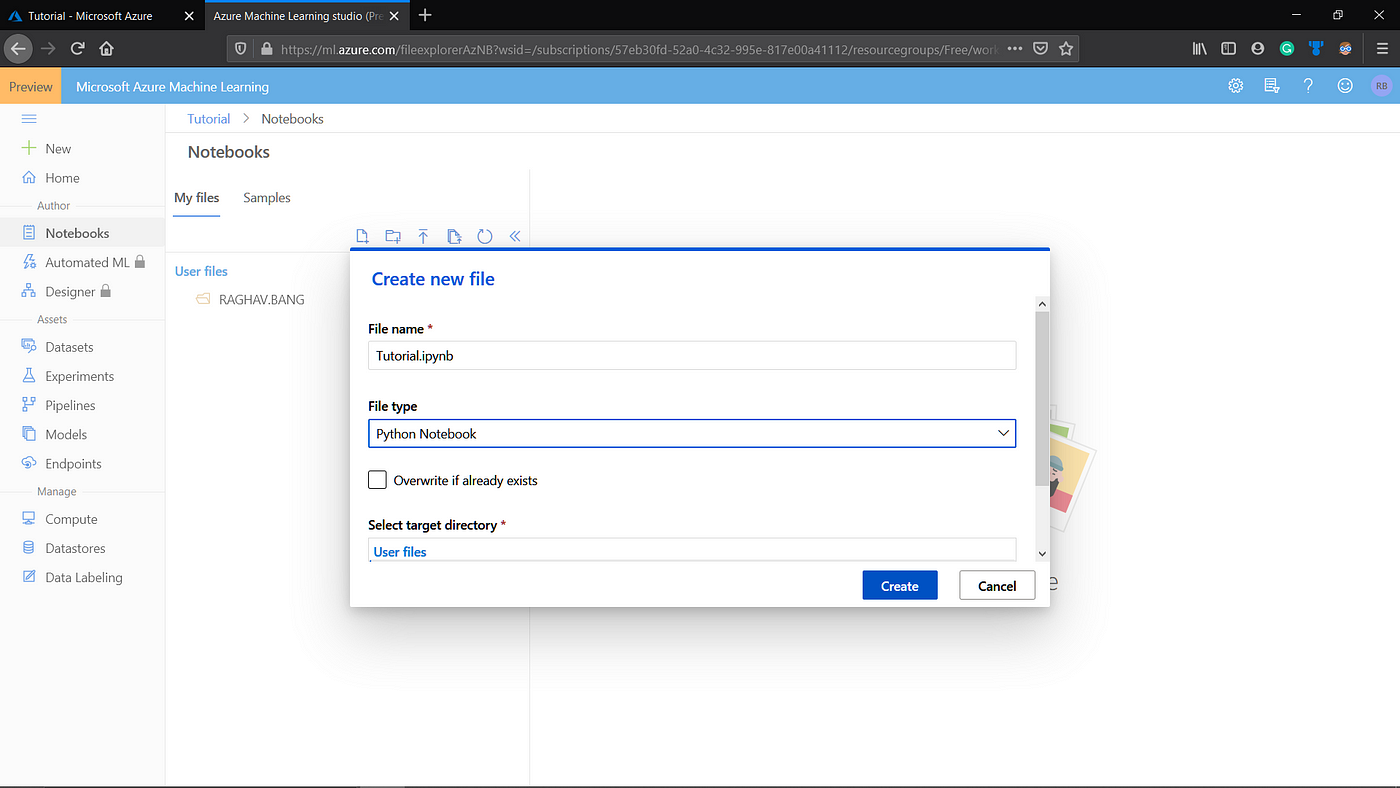
The new tab will open, it'southward the workspace that we accept created. In that location are various option on left side. Click on "Notebook". We will first create a python notebook. And then click on "create new file" icon, as shown in beneath image.
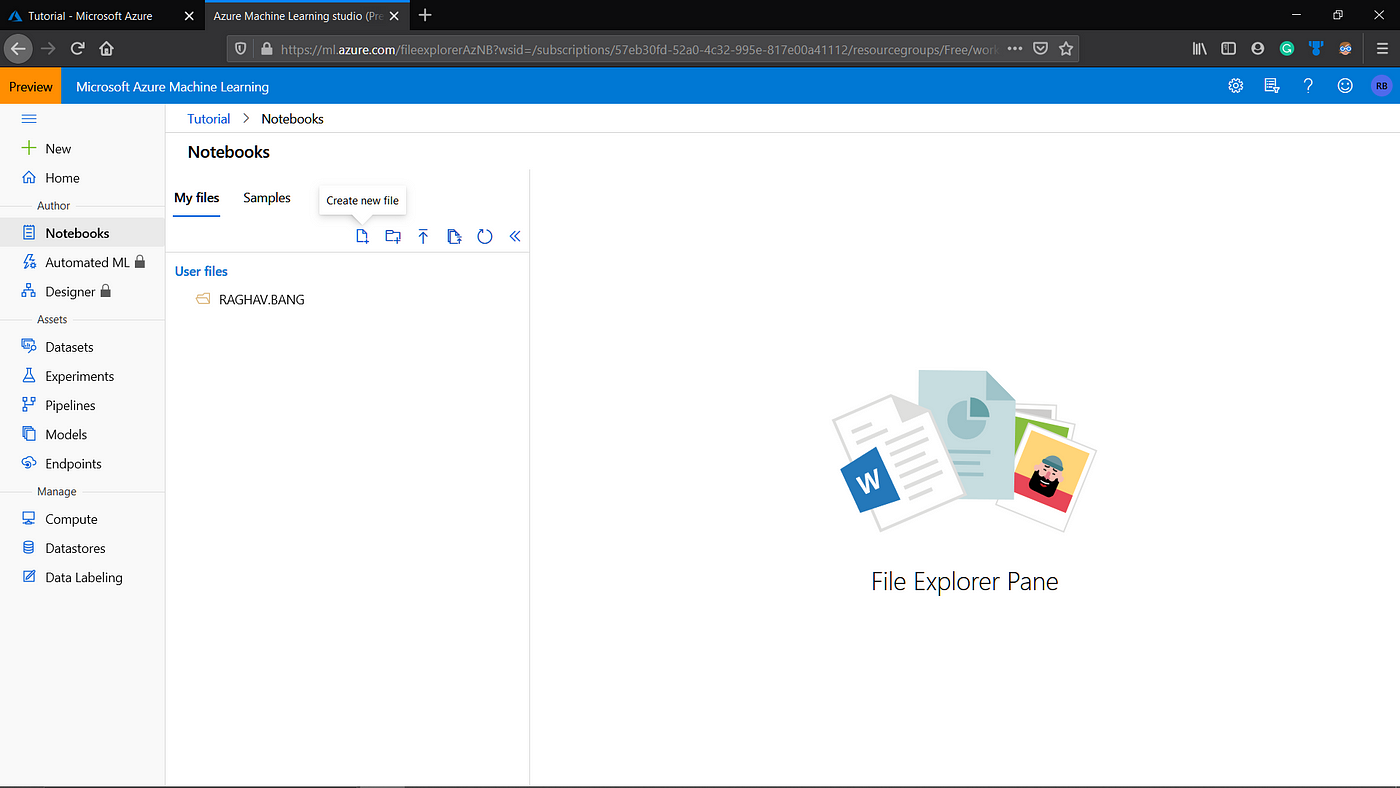
Enter the file name, and select file type equally Python Notebook and create it. You have created the notebook successfully. Only we need to create a compute that is granting the RAM and Retentiveness.
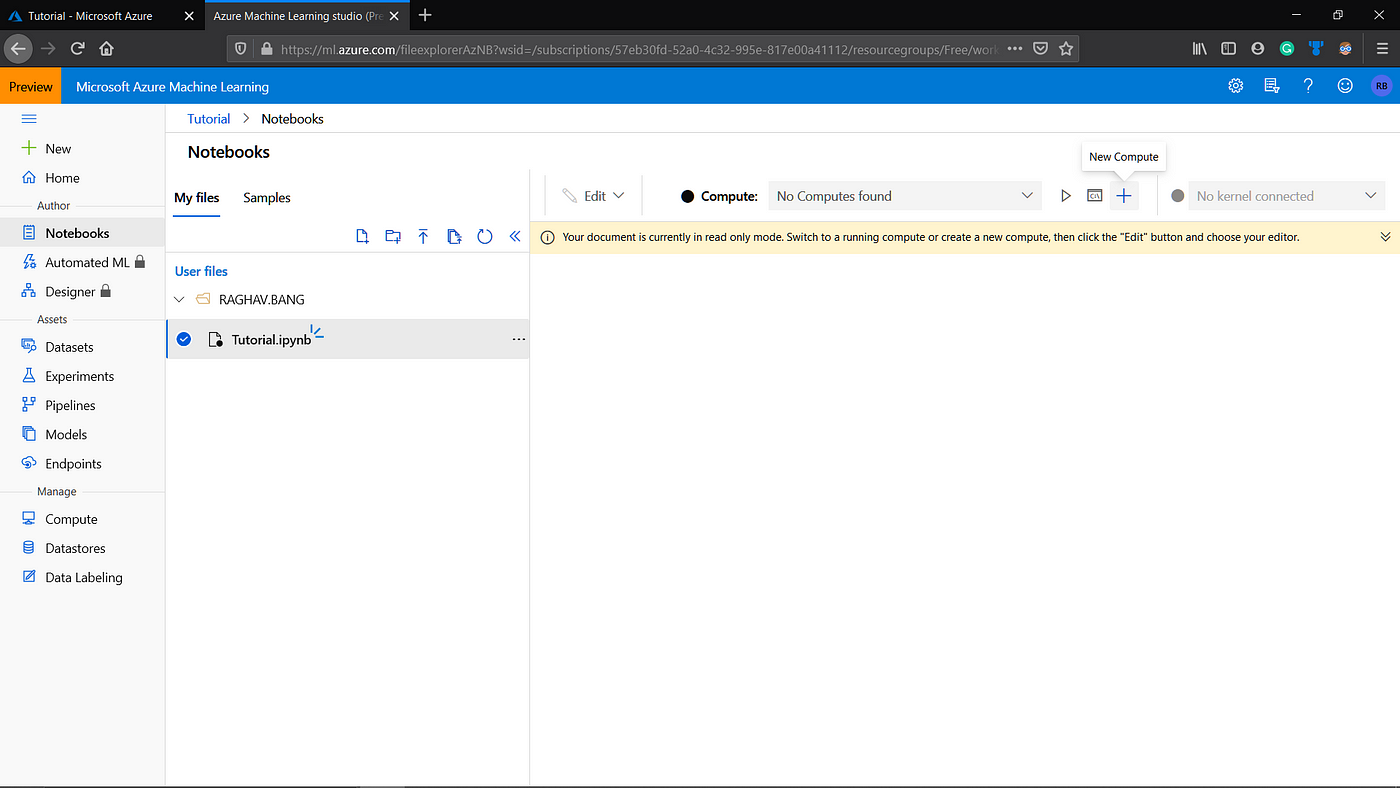
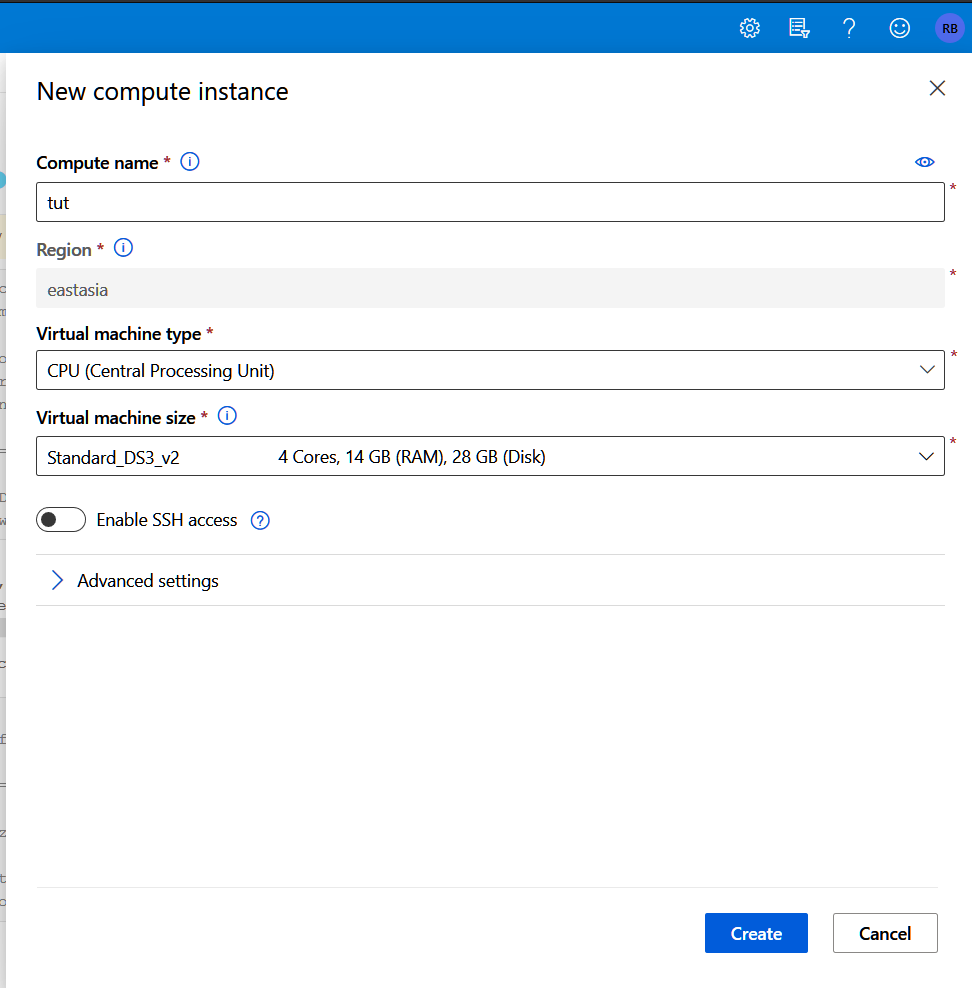
Click on new compute icon, then fill the required details. Select VM and its size as per your requirement. And then create information technology. It will take few seconds to create a compute. Till that nosotros will upload our data to workspace.
Footstep 4:
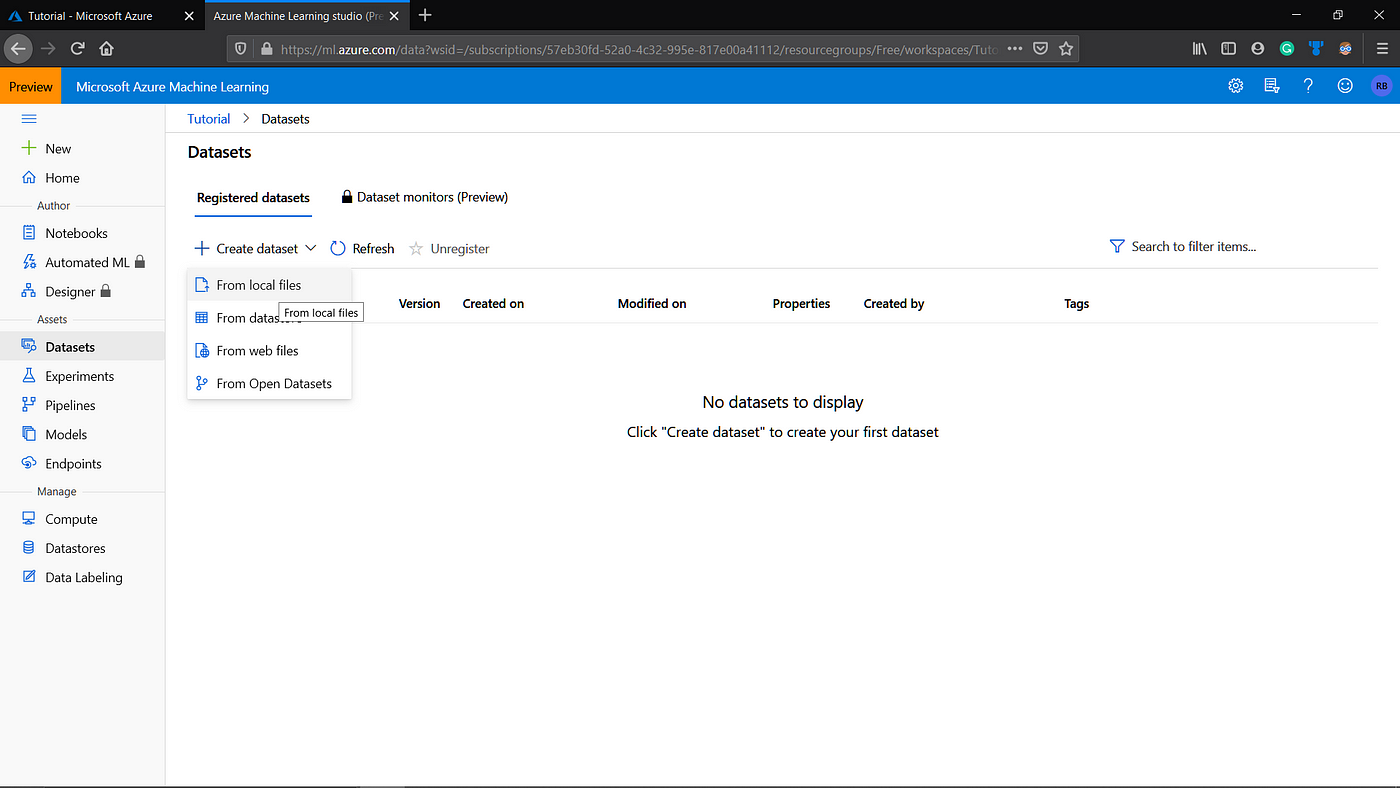
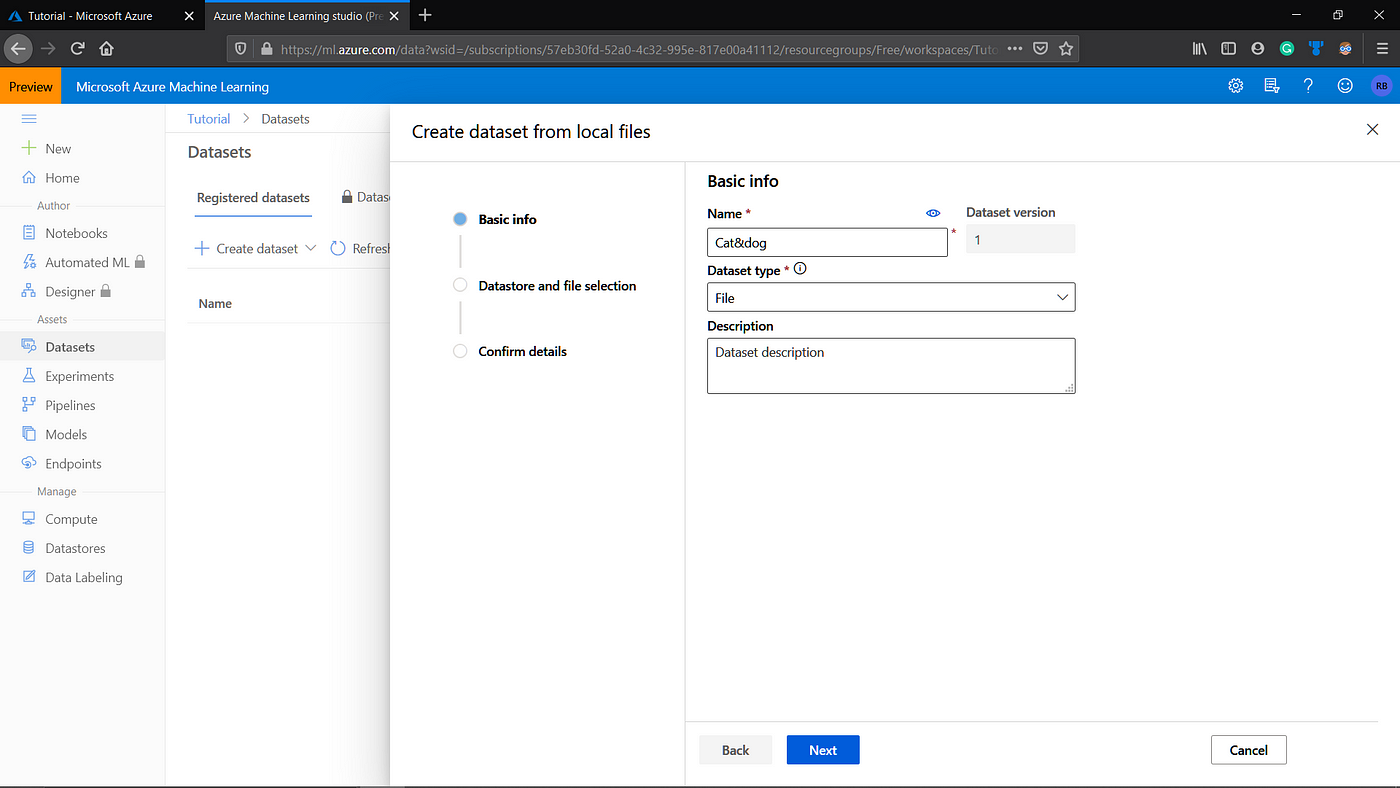
On left side console, click on "Dataset". Then click on Create dataset icon. In this tutorial, nosotros are focusing to load data from local machine only. So, select "From local files".
So proper name your dataset. In dataset type, select file. As nosotros uploading the image dataset. Select Next.
Select "Previously created data store". Then click on "browse" and select the nada file of your data-set up. Then click next button. Uploading procedure will start. Once uploading is finished, create push button will pop up. Click on information technology, and then that dataset uploading procedure is completed.

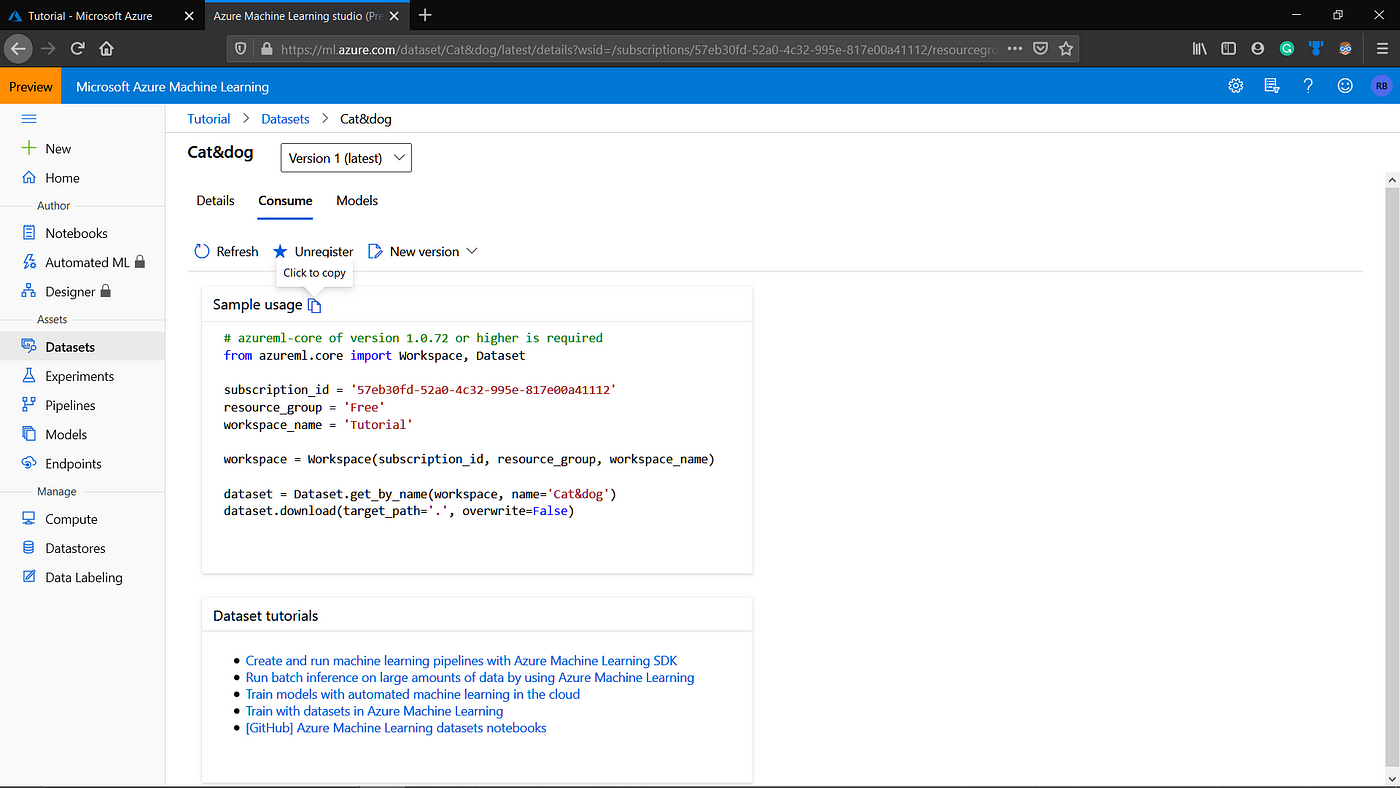
Then click on your dataset name, and and then in "Consume" tab, y'all volition discover the code. Copy it equally it will be required to get the nothing file in your notebook.
Step 5: Final footstep
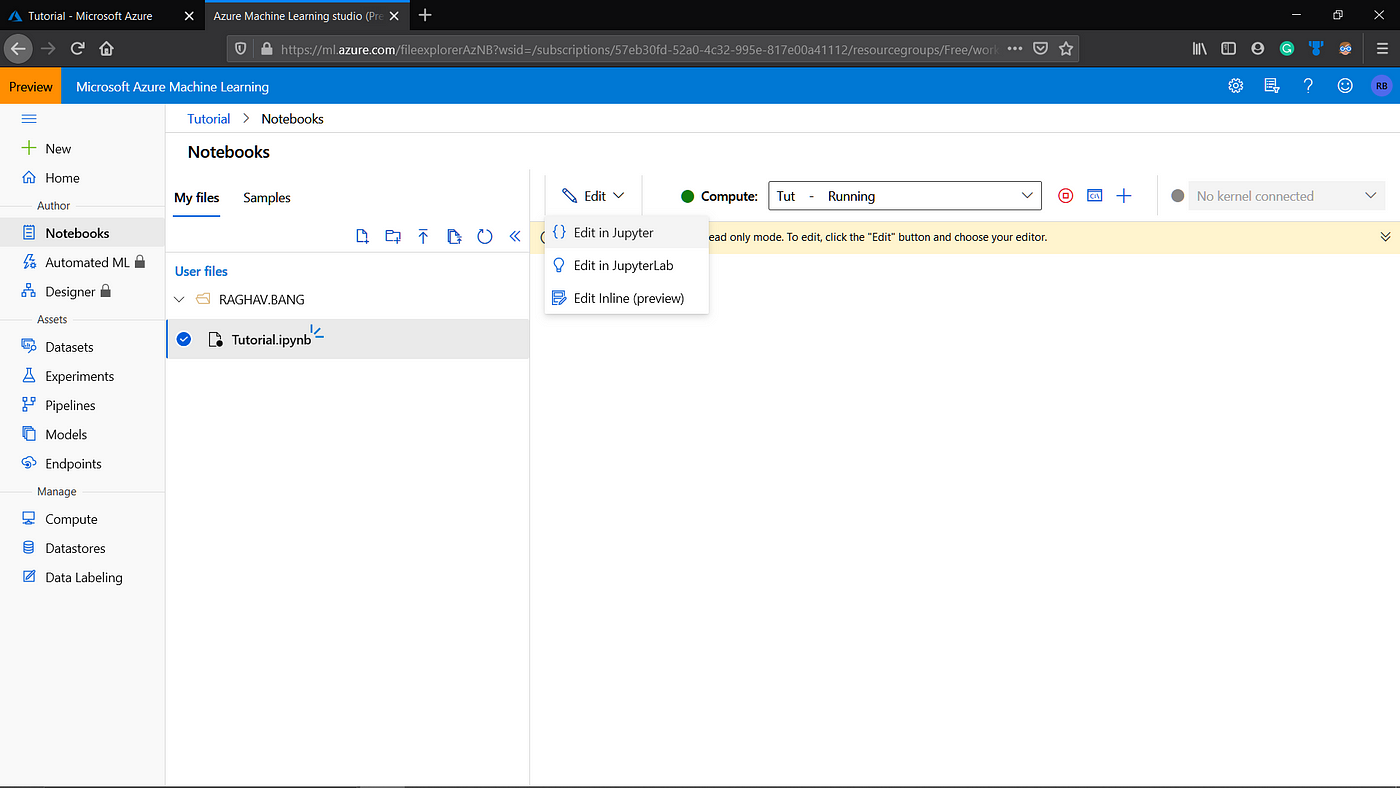
Go back to "Notebook". The condition of computing is now converted to "Running". At present click on edit button, and select the "Jupyter Notebook". The notebook that we created will open in juptyer notebook.
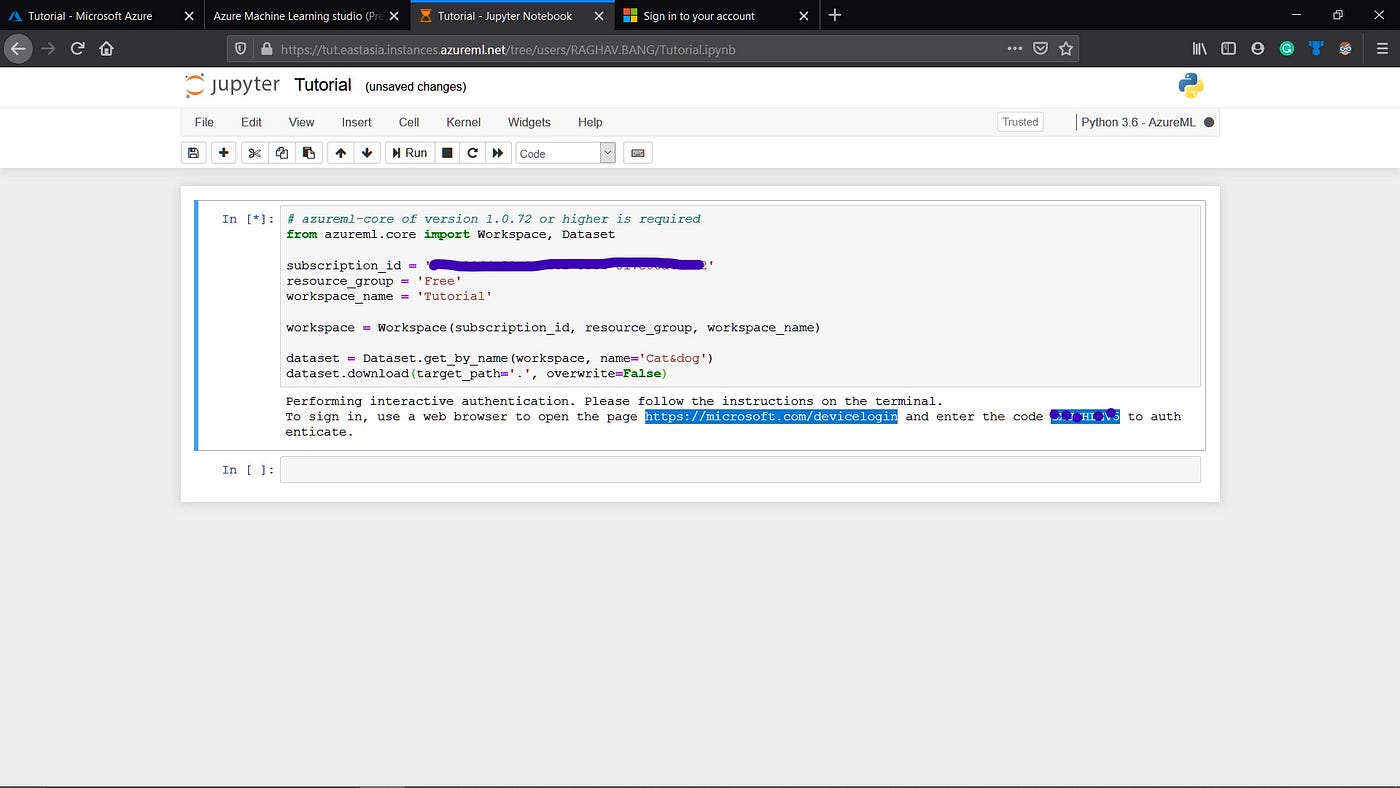
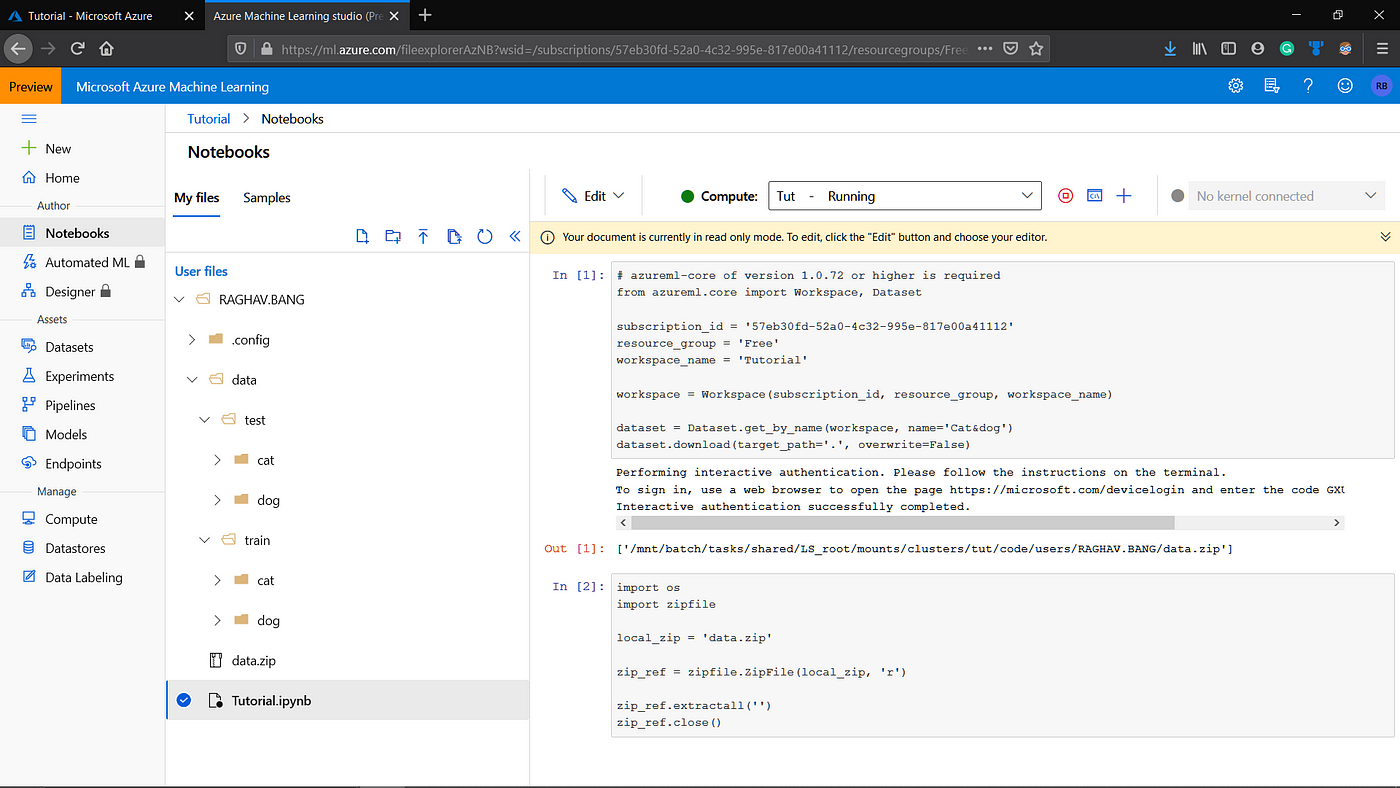
In jupyter notebook, paste the code, that nosotros copied from "Swallow" tab. And run it. It will requite y'all pedagogy to authenticate to access the data. The output of the code volition provide a link and code. Go to that link and input the given code. Run across the highlighted office in beneath image.
Afterwards the authentication, the data will loaded. Simply now, we need to extract the zip file. In the side by side cell paste the below code.
import bone import zipfile local_zip = 'data.zip' zip_ref = zipfile.ZipFile(local_zip, 'r') zip_ref.extractall('') zip_ref.close()
This will excerpt the zip file.
At present, get back to Workspace and refresh the page, y'all will discover the extracted data.
Finally, nosotros have uploaded and extracted the data!!
For any Dubiousness or help, feel free to contact me!!
Thank you for reading.
shanahanthetwor77.blogspot.com
Source: https://medium.com/raghavbang/upload-image-data-set-to-azure-machine-learning-studio-from-local-machine-1d368b75bb3f
0 Response to "User Upload to Load Data to Ml Studio"
Post a Comment